From a tapered pixie with layers to pinned-back styles and a full guide to managing the grow-out stages, these are the cuts and techniques worth knowing.
Every style on this list sits somewhere on the grow-out timeline, so there is something here for wherever your hair is right now.
Whether your hair is still close-cropped or nearly at chin length, one of these 9 looks fits where you are.
1. Tapered Pixie with Layers
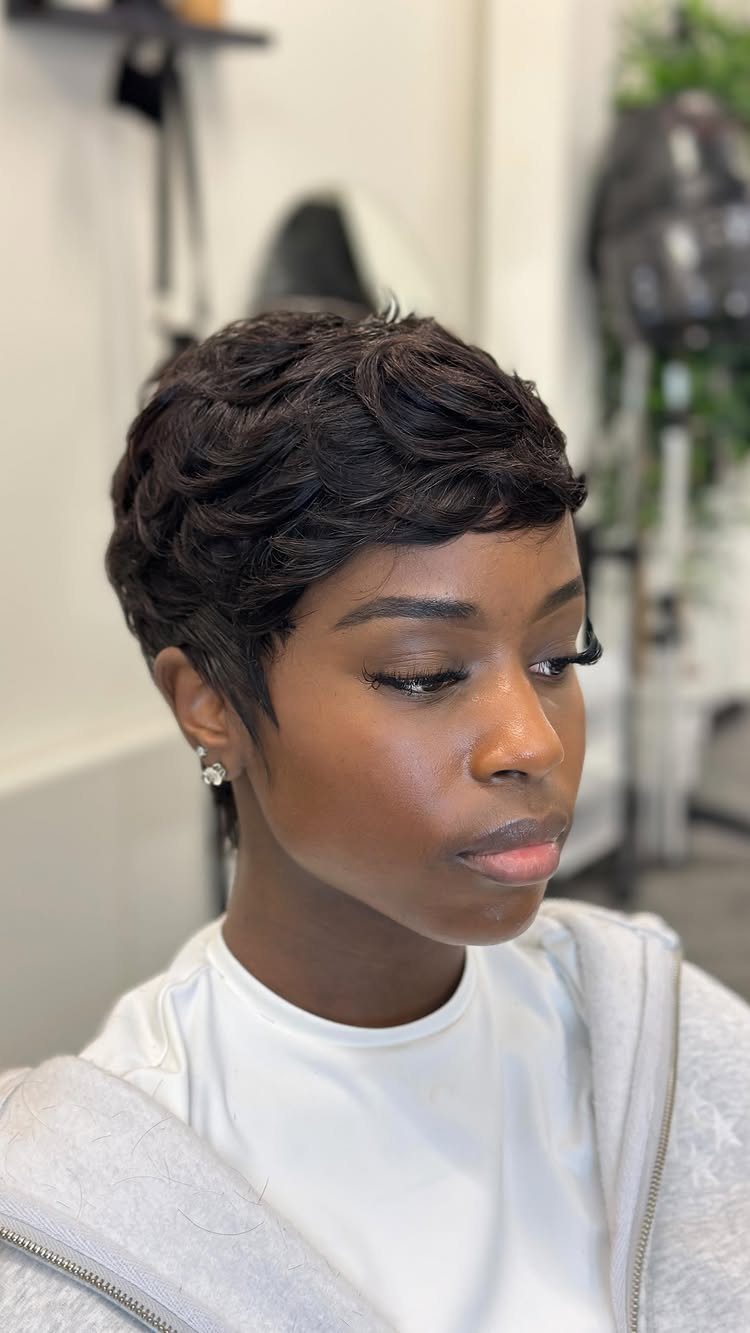
Short sides and back with textured layers piled on top give a tapered pixie its structure: the contrast is what makes the shape readable as it grows out.
Ask your stylist to keep the sides and nape clipped close while leaving length on top to layer. Point-cutting through the top sections adds definition without bulk.
For curly or coily hair, this works especially well because the natural texture does the styling work once the layers are in.
2. Side-swept Fringe
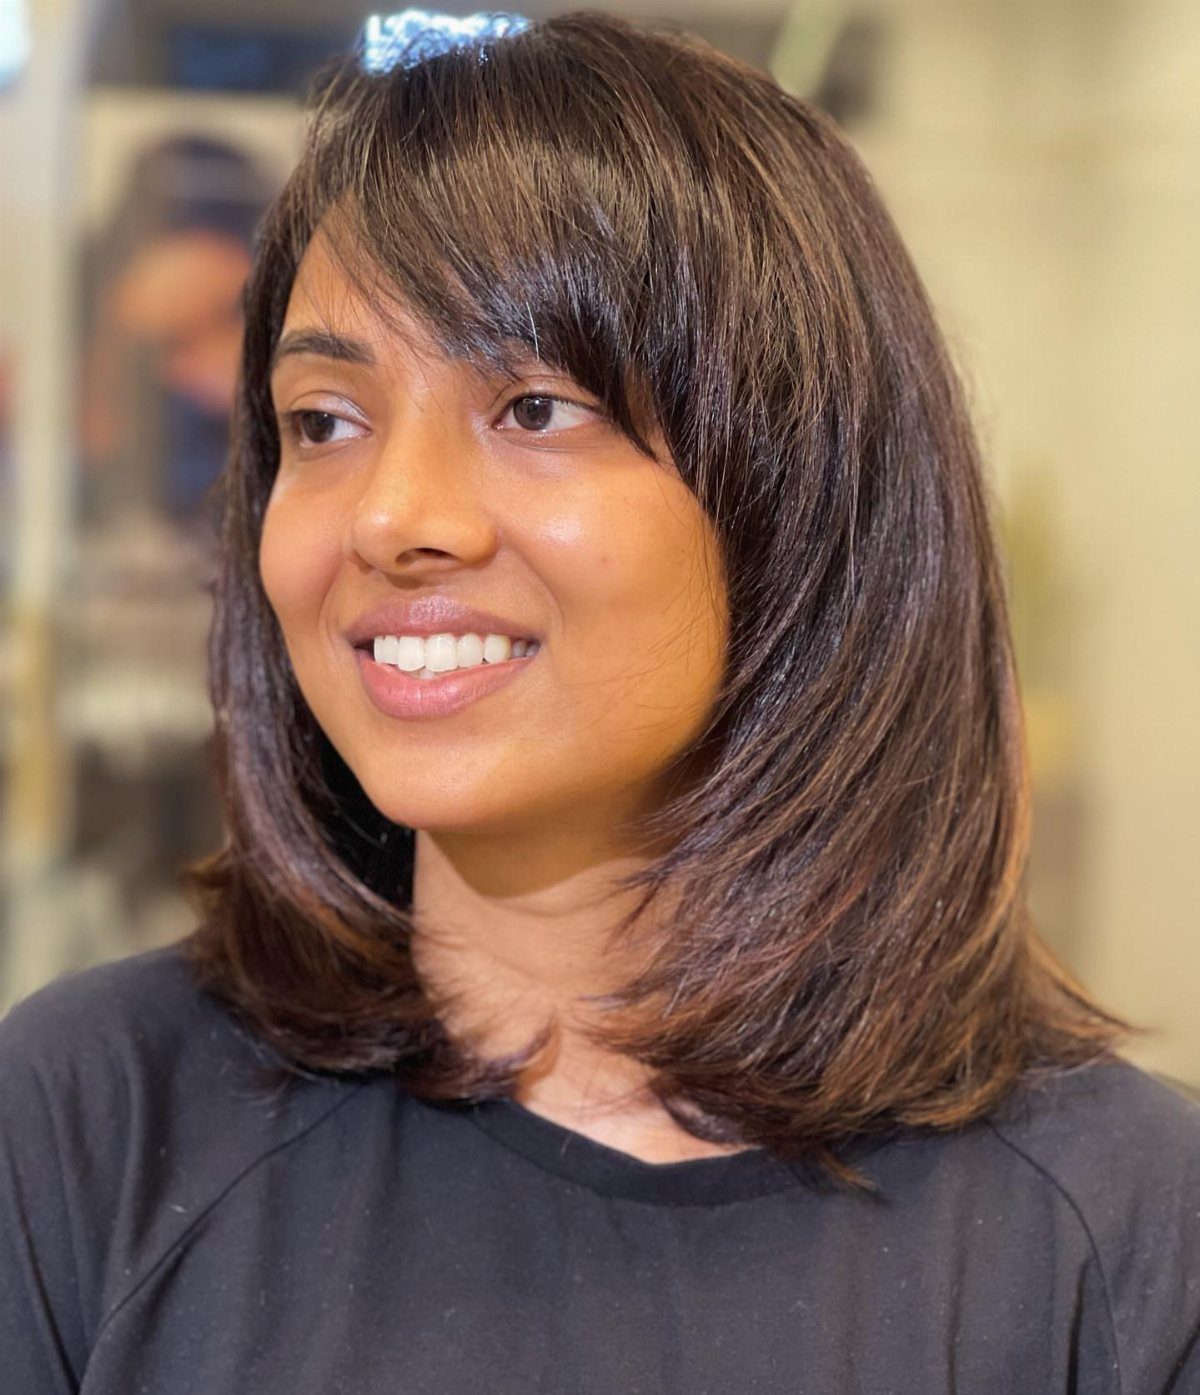
Sweeping the fringe across the forehead is one of the easiest ways to add intention to a grow-out that still feels unfinished.
The fringe falls from the longer top sections, which most people already have by mid-grow-out.
A flat iron or round brush pulled in one direction is all it takes to set the angle. Ask for the fringe to be cut on a diagonal so it moves naturally rather than flopping flat.
3. Textured Pixie Bob
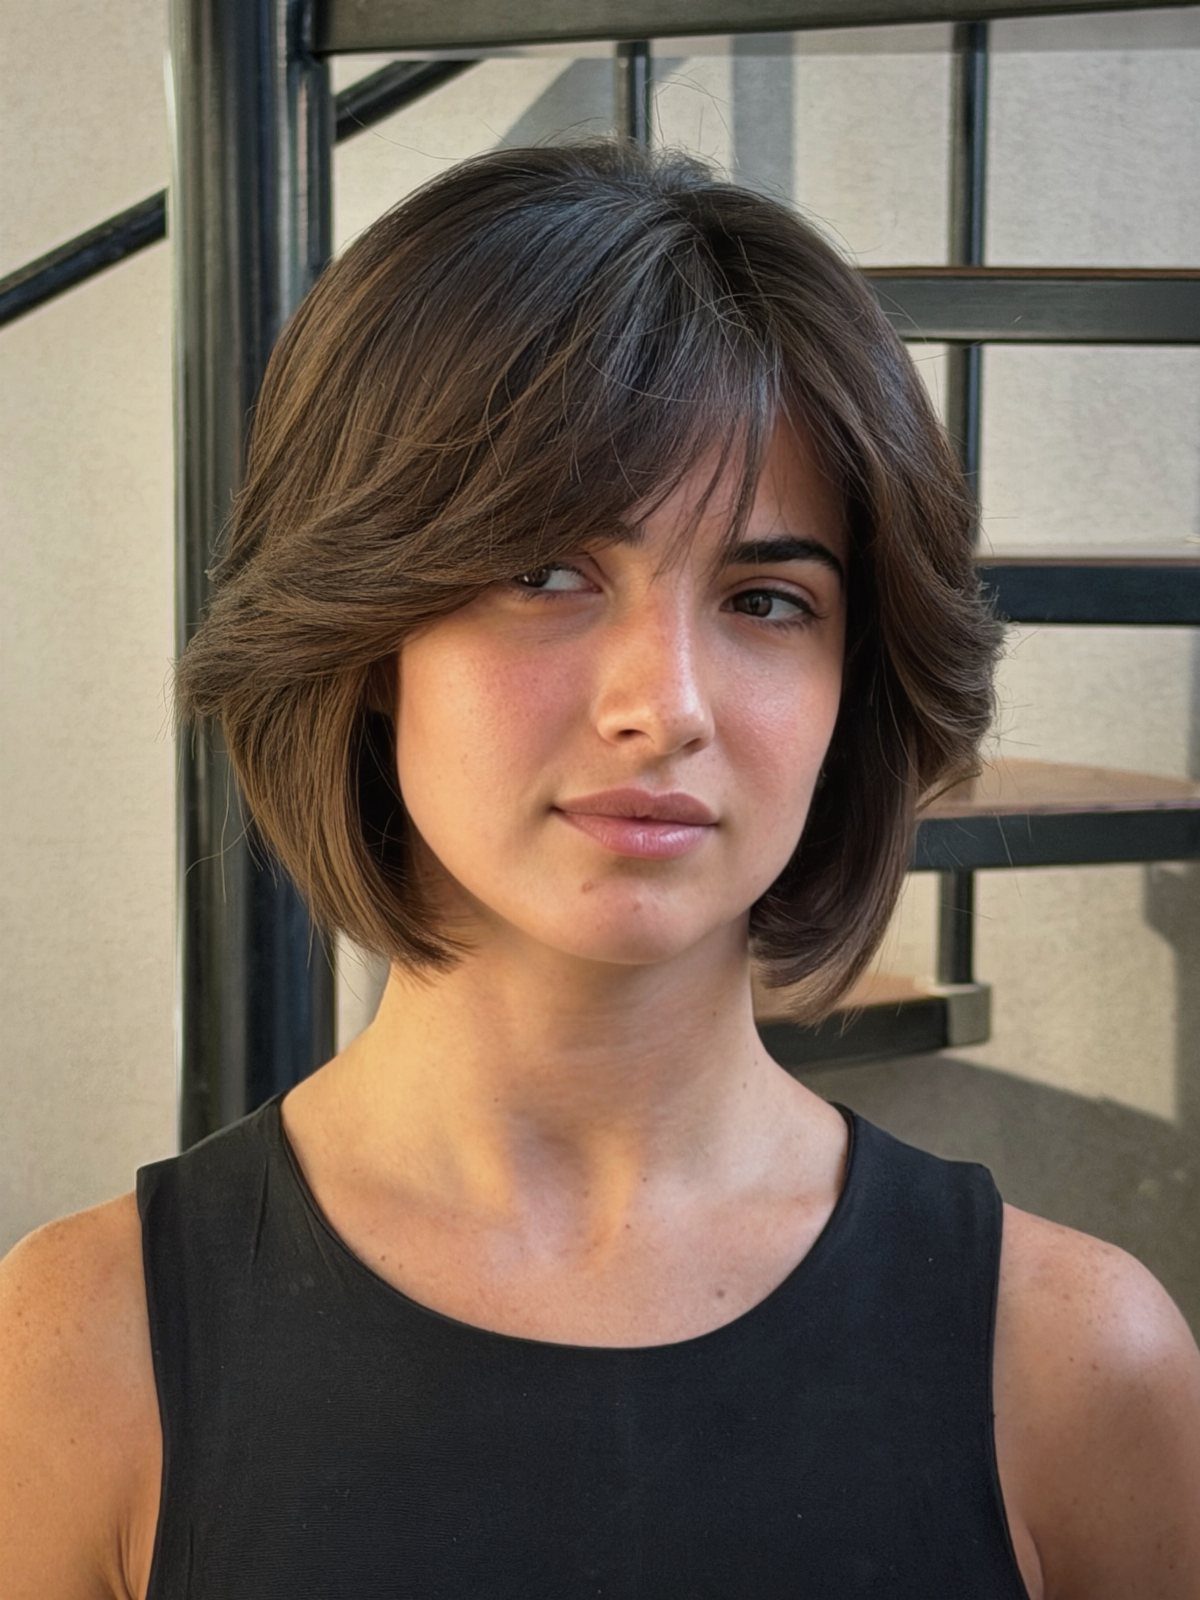
Sitting right between a cropped pixie and a short bob, this length gets awkward fast if you leave it alone and polished fast if you work with it.
Layers through the ends keep the weight from pooling and let the cut move. A little pomade or wax worked through damp hair, then air-dried, gives the pieced texture visible here without needing a diffuser or iron.
4. Curly Pixie Grow-out
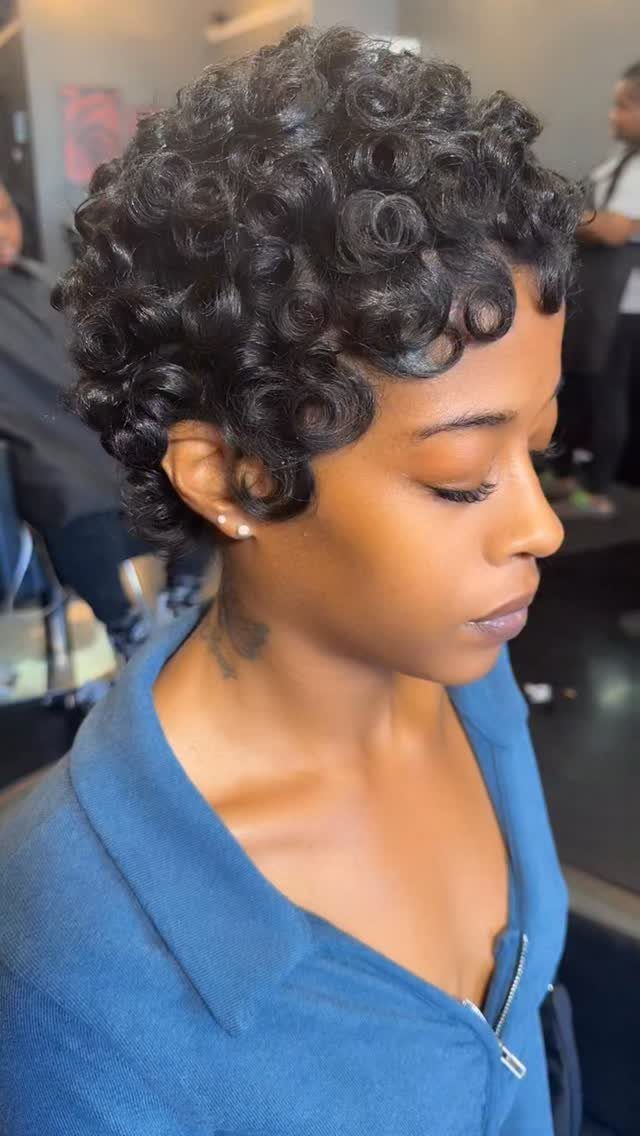
Natural curl texture is doing real work at this stage of the grow-out: the spring in the hair shortens visible length and fills out the shape so the in-between stage reads as a style rather than a waiting period.
Finger-coiling the top sections with a leave-in conditioner gives definition without weight. Avoid brushing through dry; detangle only when wet and conditioned to keep the curl pattern tight.
5. Chin-length Layered Cut
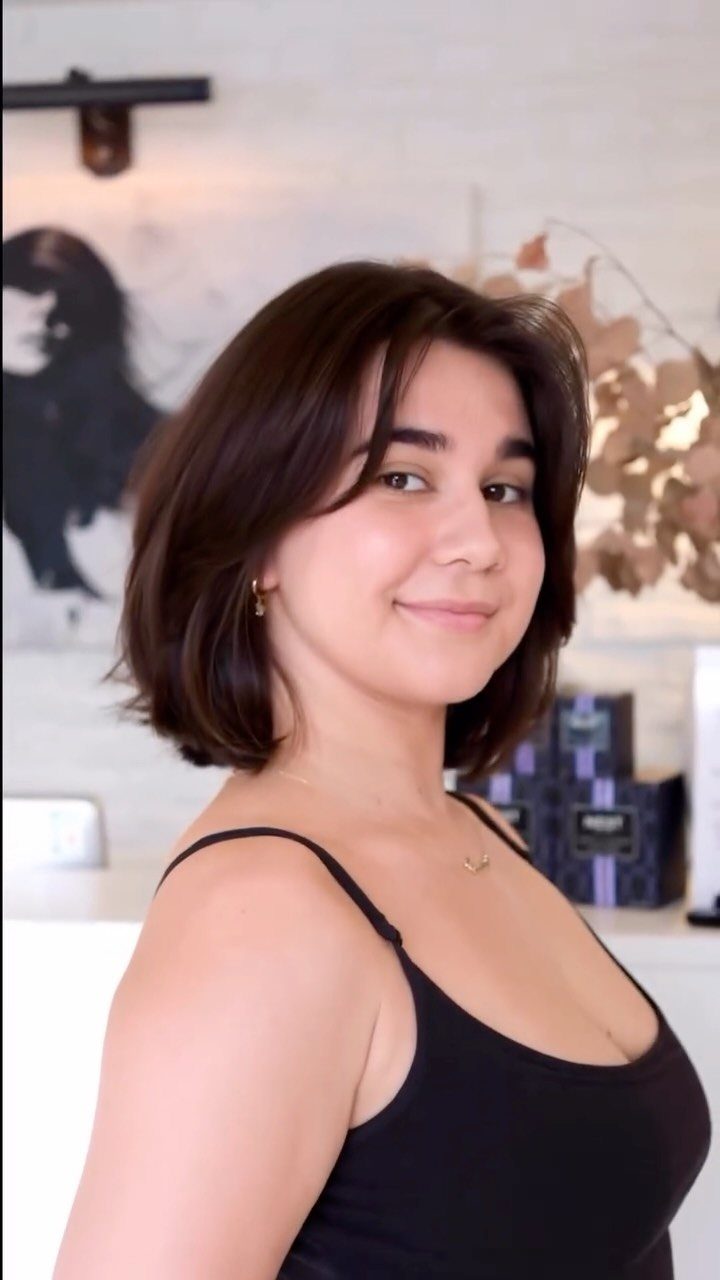
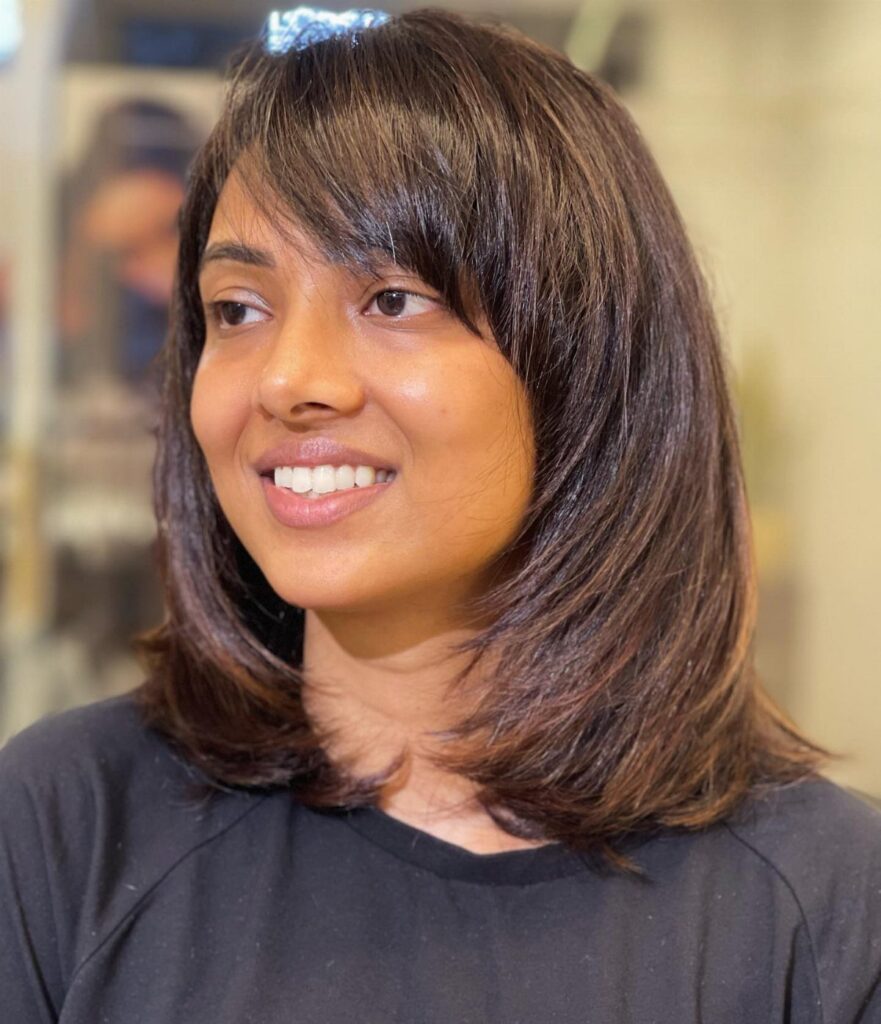
Chin length is where a lot of pixie grow-outs finally click into place. The weight is long enough to layer properly, and the ends can be textured so the cut looks chosen rather than grown into.
Layers cut from around the jaw down through the ends add the movement that keeps this length from reading boxy. Gold jewelry reads well against this shape because the open neckline stays visible.
6. Side-parted Wavy Bob
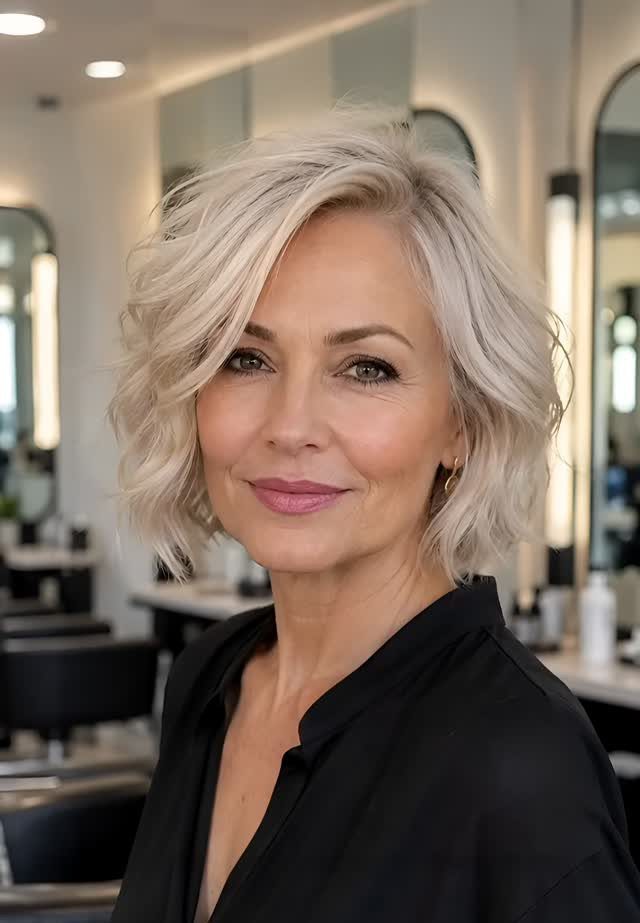
Volume and a side part turn a wavy bob into one of the more forgiving stops on the grow-out timeline: the wave does the lifting and the part gives the whole shape a clean line to organize around.
Blondes get more visual texture from wave than darker shades do, but the technique works at any color.
7. Matte Textured Pixie
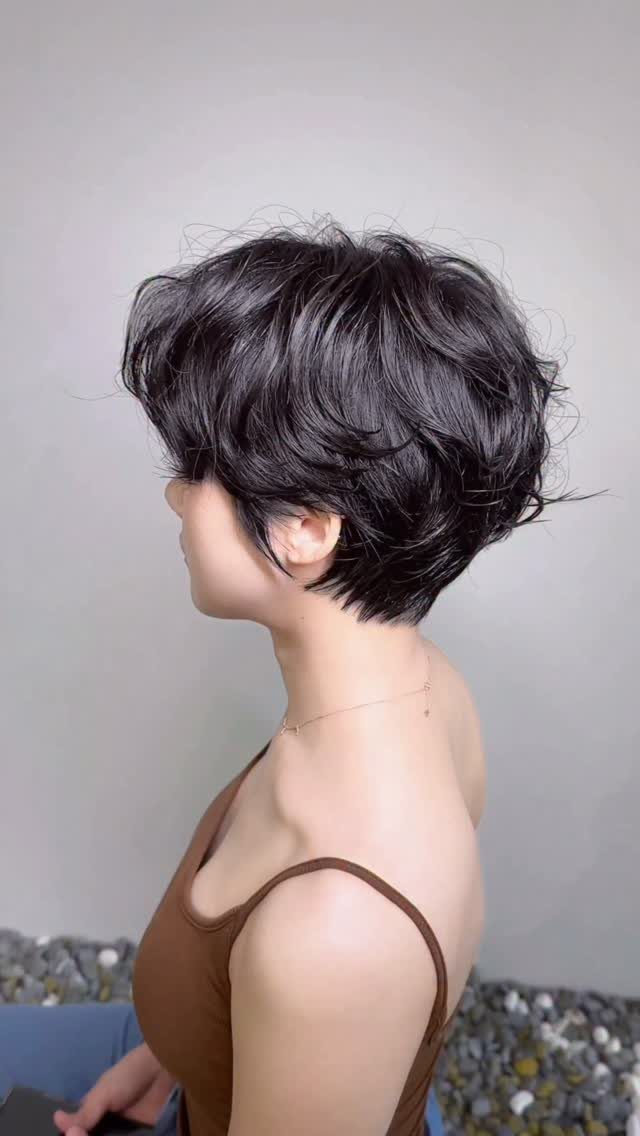
Matte finish is what separates this from a standard textured pixie: shine catches light and flattens the layers visually, while a matte product lets each piece read on its own.
Work a small amount of matte clay or paste through dry hair, pulling pieces upward and apart rather than smoothing them down. The less product, the more natural the separation looks.
This finish suits darker hair especially well, since the contrast between lifted and flat sections shows up more clearly without gloss competing for attention.
8. Pinned Back with Clips
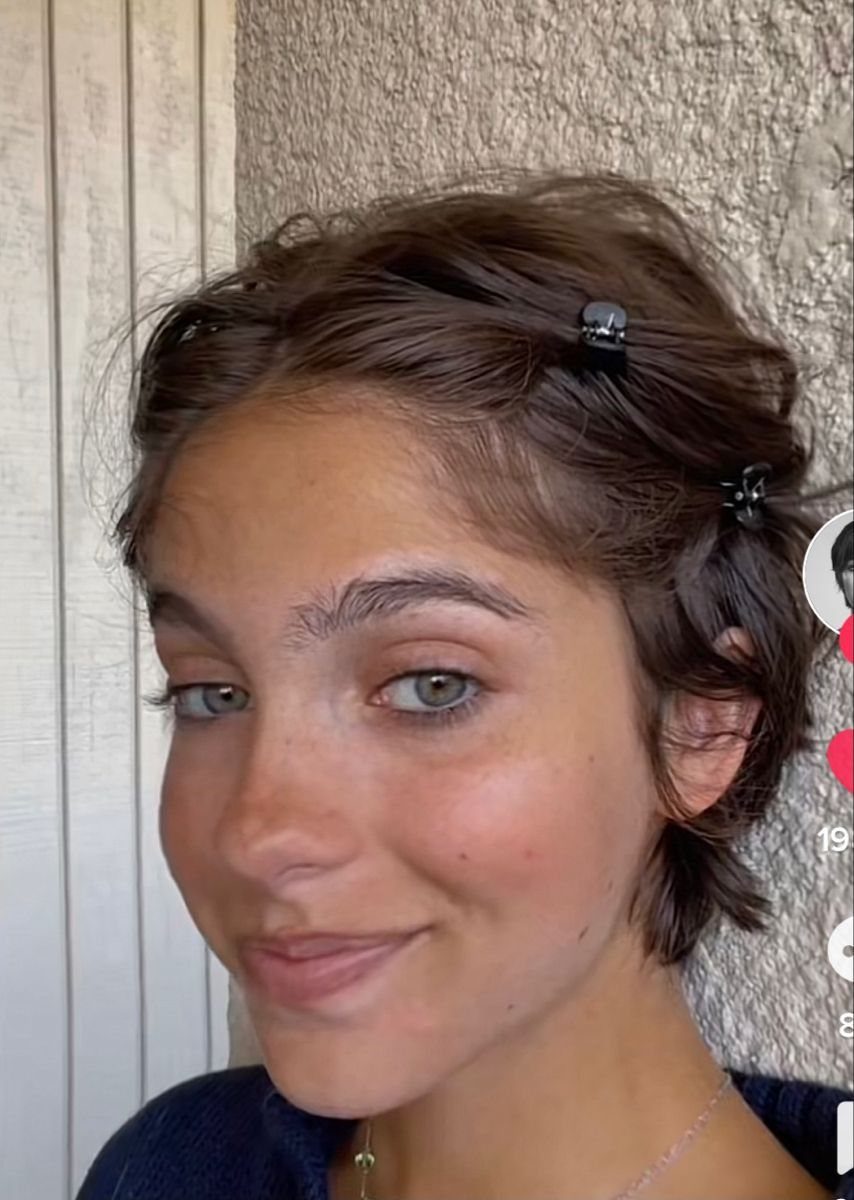
Clips solve the grow-out’s most frustrating problem: the side pieces that are too short to tuck but long enough to fall forward all day.
Small clips pinned close to the head keep the style looking considered rather than held together. Skull clips and similar styles with visible hardware read as intentional; plain bobby pins disappear, which works too depending on the look.
Either way, the clip placement matters more than the clip itself. Set them flat against the wave rather than fighting it.
9. Voluminous Layered Pixie
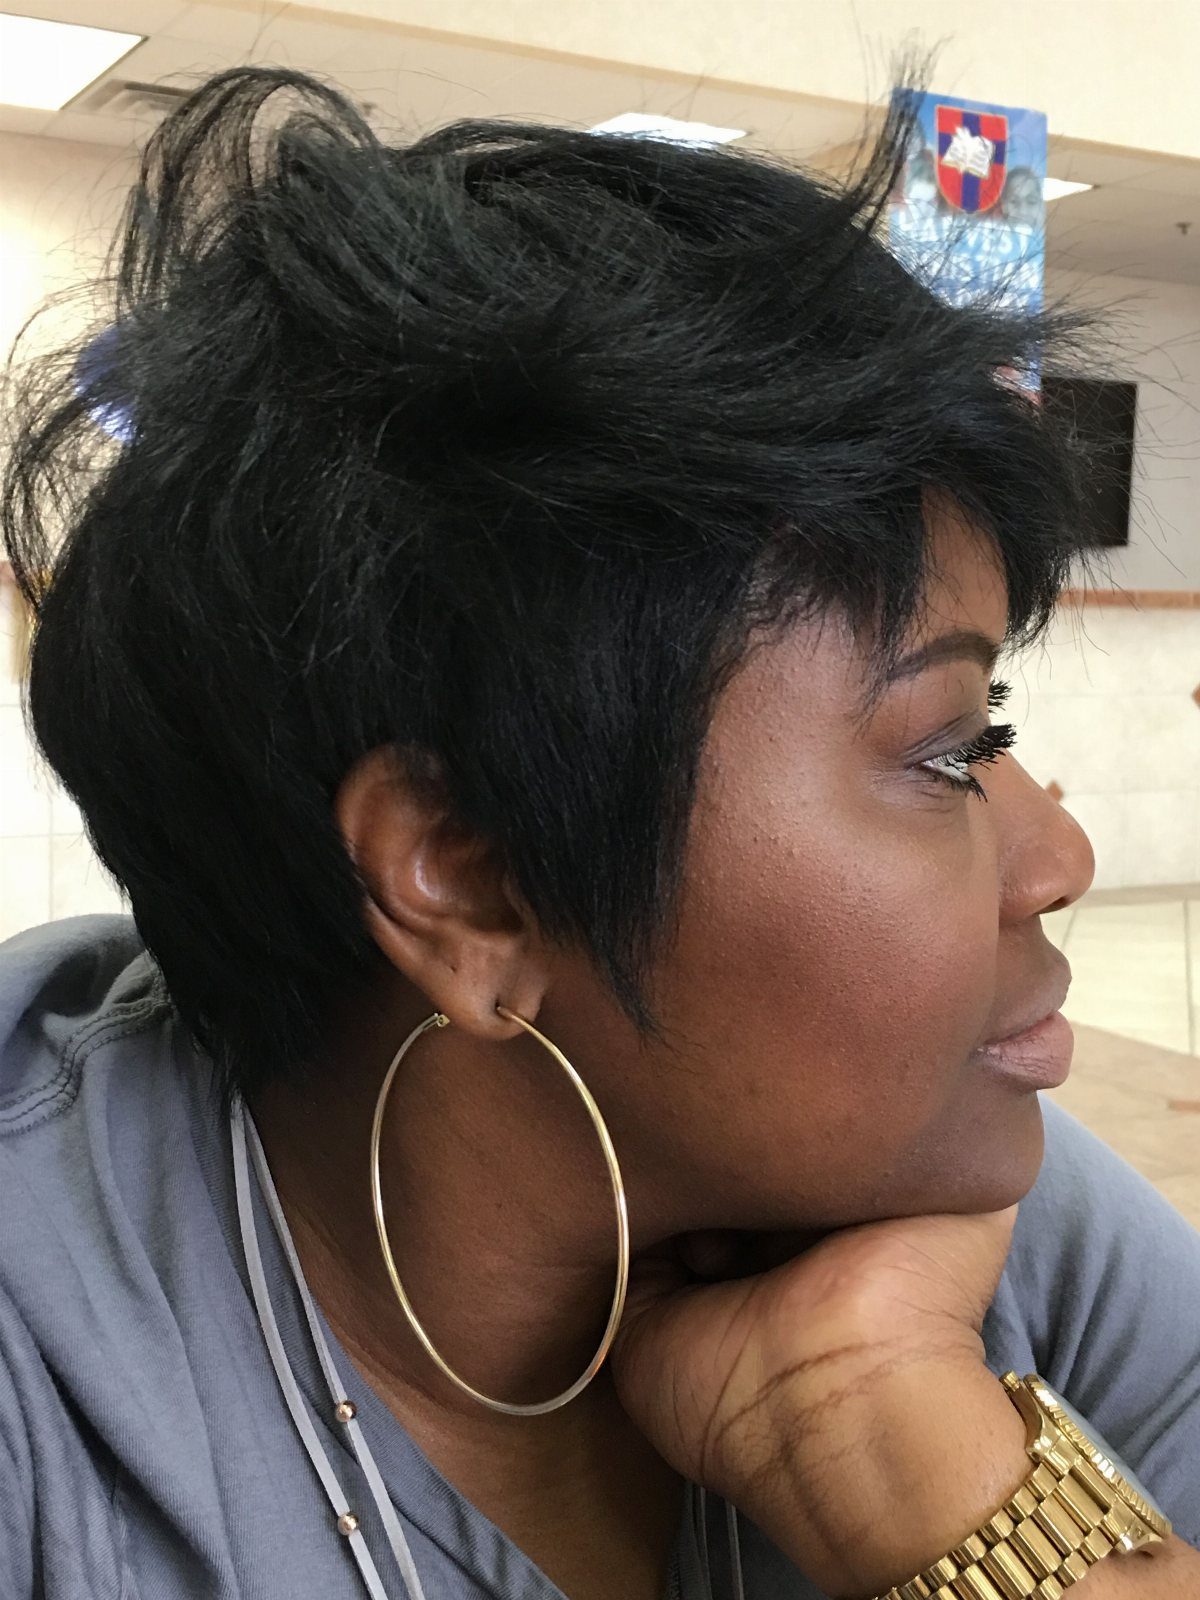
Height is doing the structural work here: volume lifted at the crown gives the pixie a shape that reads finished even while length is still catching up.
On natural Black hair, the texture and density support that lift without much product. A pick used at the roots while hair is still slightly damp sets the volume; once dry, it holds without needing to be touched.
Gold hoops and a high-volume crown read well together because the open neckline and earrings stay visible, the same logic that works for a chin-length layered cut.
Managing the Grow-out Stages
Hair grows roughly half an inch per month, so a pixie-to-lob transition takes closer to 18 months from the first awkward stage to a length with real styling options.
The early weeks are the hardest: the back and sides outpace the top, and nothing sits where you want it.
Keeping the nape and sides trimmed during this period actually helps the overall shape read cleaner, even though trimming feels counterproductive when the goal is length.
A regular trim through this middle stretch removes the scraggly ends without sacrificing meaningful length.
The final stage, from chin length onward, is where the grow-out stops feeling like a compromise and starts feeling like a haircut.
Frequently Asked Questions
What are the stages of growing out a pixie cut?
A pixie-to-lob grow-out takes roughly 18 months at about half an inch of growth per month. Chin length is where most grow-outs stop feeling like an in-between stage and start feeling like a real haircut.
What face shape works best with a pixie cut?
Oval and heart-shaped faces tend to suit a pixie most naturally because the open neckline and cropped sides balance the proportions without adding width.
That said, a tapered pixie with volume lifted at the crown works on rounder face shapes by drawing the eye upward, and a side-swept fringe cut on a diagonal softens a more angular jaw.
The cut itself matters more than a strict face-shape rule.
Can plus-size women pull off a pixie cut?
A pixie works on any body size. Volume at the crown and an open neckline create vertical proportion that reads well regardless of face or body shape.
A tapered pixie with layers on top is a reliable option because the height at the crown keeps the focus upward.